woensdag 19 oktober 2011
Walthers White Tower Restaurant
I recently completed my Walther�s White Tower Restaurant kit, which I completed in just a couple days, opposed to my last 2 structures which took over a month! I know the kit is a lot simpler then my last 2 structures, however as my skills get better, so does the time that it takes to complete them.


Read More..

Like my Merchant�s Row I kit, this one needed a lot of masking. The kit calls for white exterior walls and silver trim, but I decided to change this. I first sprayed the walls with Testor�s light aircraft gray paint. Once dry, I started carefully masking the exterior trim by cutting very small pieces of masking tape and smoothing it down with a small flat head jeweler�s screwdriver. I then hand painted the trim a dark gray.


I scratch built the entire interior, including the tables, benches, and counters, all from styrene. The black and white tile flooring is just a print out on plain printer paper of a pattern I made in Photoshop. For lighting, I used a small 12v automotive bulb that I attached to the top corner of the kitchen walls. I hid the leads behind the kitchen walls so they were out of sight, and have them exiting the building out of the rear base.


Just like I did for my Merchant�s Row I kit, the exterior of the building simply slides over the interior, making for very easy access to the inside lighting/furniture in case anything ever needs to be fixed, changed, or added. I did not use the window glazing that was included in this kit, as it was very poor quality and opaque. I instead used clear styrene from Evergreen.


The window awnings were designed in Photoshop and printed on printer paper. I then cut the awnings out and glued them to a thin strip of styrene. I drilled small holes with a thumb drill into the exterior walls, and shaped supports out of thin steel wire, which then slid into the holes. I then glued the awnings to the supports and exterior wall.


The decals used were included with the kit; however I did some slight modifications. The �White Castle Hamburgers� decals also had �5 cents� and �buy a bagful!� in the design, but I opted to not include these as it made the signs look too cluttered. For the decals, I first applied a gloss coat to the structure, and added the decal once the gloss coat was dry. The decal was then covered with a second gloss coat. This was to reduce the visibility of the glossy decal backing. I then sprayed the entire structure with dull coat to get rid of any luster.

I also did this small Atlas Telephone Shanty kit at the same time, which I purchased for $0.99 at a hobby clearance store in Calgary last month.

vrijdag 7 oktober 2011
Walthers Merchant's Row I
The weather this September was even nicer then it was in July and August, and to be honest, it was difficult to stay indoors to do any work on my layout, especially in the basement which has not even one window. Even with the beautiful weather, I still managed to find some time to finally tackle and complete my Walther�s Merchants Row I kit.

I received this kit as a Christmas gift last year from a friend, and finally pulled it out of the box about 2 months ago. I started by constructing the basic shell; the 4 walls and 2 doors, leaving the roof and window glazing off to more easily paint the walls. I finalized my paint schemes before I started painting, comparing colours on paper to ensure they didn�t clash with each other. I then started painting; small section by small section.

This structure has lots of detailed sections and components, all on one common piece of styrene. I found (at least for myself) that you need two basic skills to successfully paint this: patience and masking tape. After painting each section, I made sure it was completely dry before painting the next. This ensured that overlapping colours did not bleed together, and that I didn�t accidently put my fingers in wet paint while painting a different section. Masking tape was also essential for straight, crisp lines. I don�t have a very steady hand, so painting a straight edge freehand is almost impossible for me.


I used a hobby knife to cut small pieces of masking tape for almost all straight edges, using a small flat jeweler�s screwdriver to push the masking tape hard to reach areas. This came in especially handy when painting the window frames (as seen above). The extra time it took to mask and allow the paint to dry really made the difference in the end, not to mention how it made up for the shortfalls in my free-hand painting skills.


?
Once the basic structure was painted, I used a white wash on the red brick sections to highlight the bricks, then sprayed the entire model with Testors Dull Coat. I then used clear styrene for the window glazing. For the blinds, I used Google image search to find several different types of blinds, then shrunk them down in Adobe Photo Shop to the sizes I needed. I then printed the blinds out on a colour printer, and cut them out as needed. I then glued them to the back of the clear styrene windows.


?
CLICK THE IMAGE ABOVE FOR A HIGH RESOLUTION VERSION OF THE BLIND TEMPLATE THAT YOU CAN PRINT AND USE FOR YOUR OWN WINDOWS
I wanted do a couple interior scenes just for fun, as well as add some interior lighting. I was posed with 2 issues however. The first was that I did not want to light every window in the structure, and second was that I needed to divide up the interior, as the kit has so many windows that it looked unrealistic when you looked in a window at one end and could see all the way through to the other end!


To divide the structure into interior rooms, I first cut a base from a bulk sheet of styrene which fit perfectly inside the structure to act as the floor. I then made interior walls with styrene, gluing them to the base. I made sure that the building�s shell slid easily over this interior �unit�, ensuring that the interior walls didn�t rub against the exterior shell. I built the interior as a removable insert so I could more easily work on the interior scenes and lighting, both now and in the future.


I used cardstock from a craft store for the flooring and walls, mimicking carpet and wood flooring, and painted and wallpapered walls. I put a large piece of cardstock towards the back of the interior unit, reaching all the way up to the roof, blocking out all light from reaching the rear windows of the building. For the second floor, I built individual small rooms from a combination of styrene and card stock which I then glued directly to the inside of the outer shell. For the rooms I wanted lit, I simply cut a small doorway opening to allow light in, and for the ones I wanted dark, I just left them sealed.


The interior scenes are furnished mostly with painted accessories from a Model Power interior accessories kit. I printed small photographs and paintings I found online on a colour printer then cut them out and glued them to the walls to represent full sized artwork. For the grocery and clothing storefronts, I built small photo holders from styrene, and glued these behind the windows. I then took images of real storefronts, re-sized them, and printed on a colour printer. I then cut them out and inserted them into these small holders behind the window glazing. I now have storefronts that look like they have real window displays. You can read full instructions on this method in this month�s Model Railroader magazine (October, 2011).


Lighting the unit is achieved by a light box that I built out of styrene. It is lit with 3 small 12 volt incandescent bulbs, and is painted black on the top, back, and sides so light only glows from the front and bottom. The box sits snugly in a slot I left in the building above the main floor walls and behind the second floor rooms. Light from the bottom of the light box lights all of the main level consistently, while the light glowing from the front of the light box lights the top level rooms through the small doorways. I opted to use a light box as the styrene diffuses the light evenly and reduces harsh shadows. The incandescent bulbs are preferred over LED�s as they have a warm, yellow glow (which is difficult to replicate with LED�s), even though incandescent bulbs are not as efficient and give off lots of heat.


 ?
?I finished the model with dry transfer decals from Woodland Scenics; transferred directly to the window gazing as well as signs included with the Merchant�s row kit. The �Mitch�s Antiques� and �T&B Clothing� signs, as well as the coke product logos were all printed on photo paper, then cut and glued to the structure/signs. The final product turned out pretty good, or at least as good as I wanted it to. I took my time on this one, and I think it paid off!

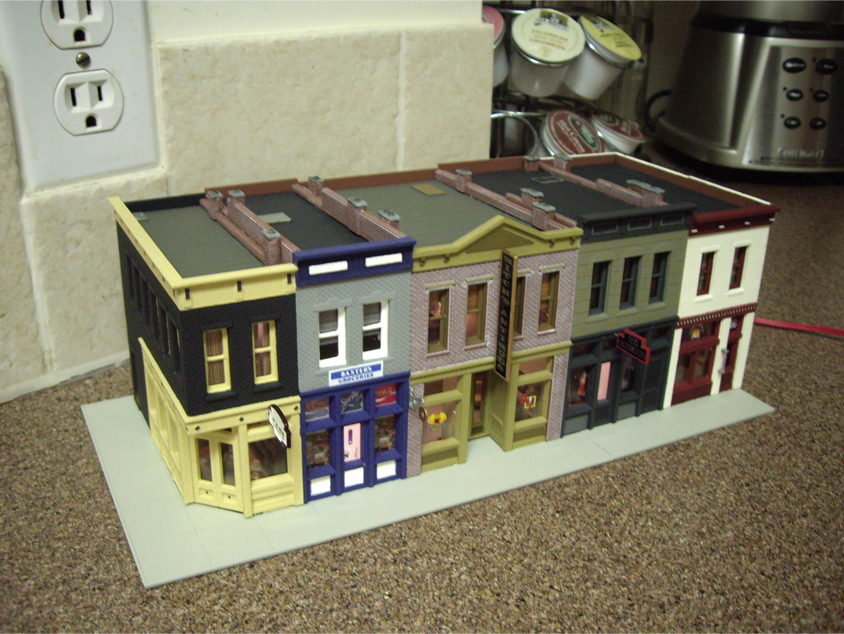


I�ve now started working on a Walther�s White Tower kit, which I plan on building as a bank (possibly). The cold, fall weather is definitely here, and summer is officially gone. Time to start working again in my basement on my actual layout!
zondag 24 juli 2011
Freight Station
I�ve taken a little break from my layout, and instead decided to spend the last few weeks trying my hand on my first model structure. I have never put together a plastic model building before, and the last time I did any kind of plastic model was a couple cars that I did back when I was 12-13 years old, which turned out less-than-satisfactory. This kit was given to me by my friend, who found it mixed in with a bunch of junk at a local thrift-store. The kit is an old POLA-HO Freight Station #557. I was surprised to find that all the pieces were intact inside the kit, and nothing was missing except a couple small accessories. This would be a perfect practice kit!


The kit was missing its instruction manual, but it was pretty self explanatory how everything went together. I did however change a few things with the roof. I didn�t like how far the roof extended out from the front of the building to cover the loading deck, and also extended the full length of the building. This overhang covered too much of the first floor windows and doors, so I cut it back, and excluded the overhang between the first and second floors, as seen below.


I used Humbrol enamel paints (which I prefer greatly over Testors brand) thinned about 30 � 50% depending on the application. As I�ve said before, I�ve never really worked successfully with enamel paints, but with patience and determination, the painting went pretty well for my first attempt. I used a wash of white acrylic for the mortar between the bricks, and a black wash for the deck surface and base. I sealed everything in with a coat of Testors Dull Coat.


I also built a small interior scene of a storage room (as seen above). The entire structure is lit with 2 small bulbs, with leads extending out the bottom of the base. I used clear styrene coated with dull-coat for the window glazing. This allows for a more uniform lighting effect across all windows. I was pretty pleased with the final result, and I am now more confident to move onto bigger and better structure projects.
I went back to work on my layout a few nights ago, working on the base structure of all the landscape and terrain. I will also be starting my second structure kit right away, my Walther�s Cornerstone Merchant�s Row 1 (kit # 993-3028).
Read More..


I also built a small interior scene of a storage room (as seen above). The entire structure is lit with 2 small bulbs, with leads extending out the bottom of the base. I used clear styrene coated with dull-coat for the window glazing. This allows for a more uniform lighting effect across all windows. I was pretty pleased with the final result, and I am now more confident to move onto bigger and better structure projects.
I went back to work on my layout a few nights ago, working on the base structure of all the landscape and terrain. I will also be starting my second structure kit right away, my Walther�s Cornerstone Merchant�s Row 1 (kit # 993-3028).
woensdag 22 juni 2011
The Backdrop
I originally cut the plywood backdrop to be in the shape of mountains, but soon realized that it would be difficult and unrealistic to finish it this way. Instead, I decided to paint the mountains on one large backdrop, this way allowing myself to include the sky and have the backdrop extend further up to the ceiling.
![]()
![]()
The first act of business was to build the rock bluffs that are extensions of the large and small mountains and extend to the bridge. I only had about a 3/4 of an inch between the track and the wood backdrop, so I had to make these rock bluffs pretty thin.
![]()
![]()
![]()
![]()
![]()
![]()
![]()
![]()
![]()
![]()
![]()
Read More..


The first act of business was to build the rock bluffs that are extensions of the large and small mountains and extend to the bridge. I only had about a 3/4 of an inch between the track and the wood backdrop, so I had to make these rock bluffs pretty thin.

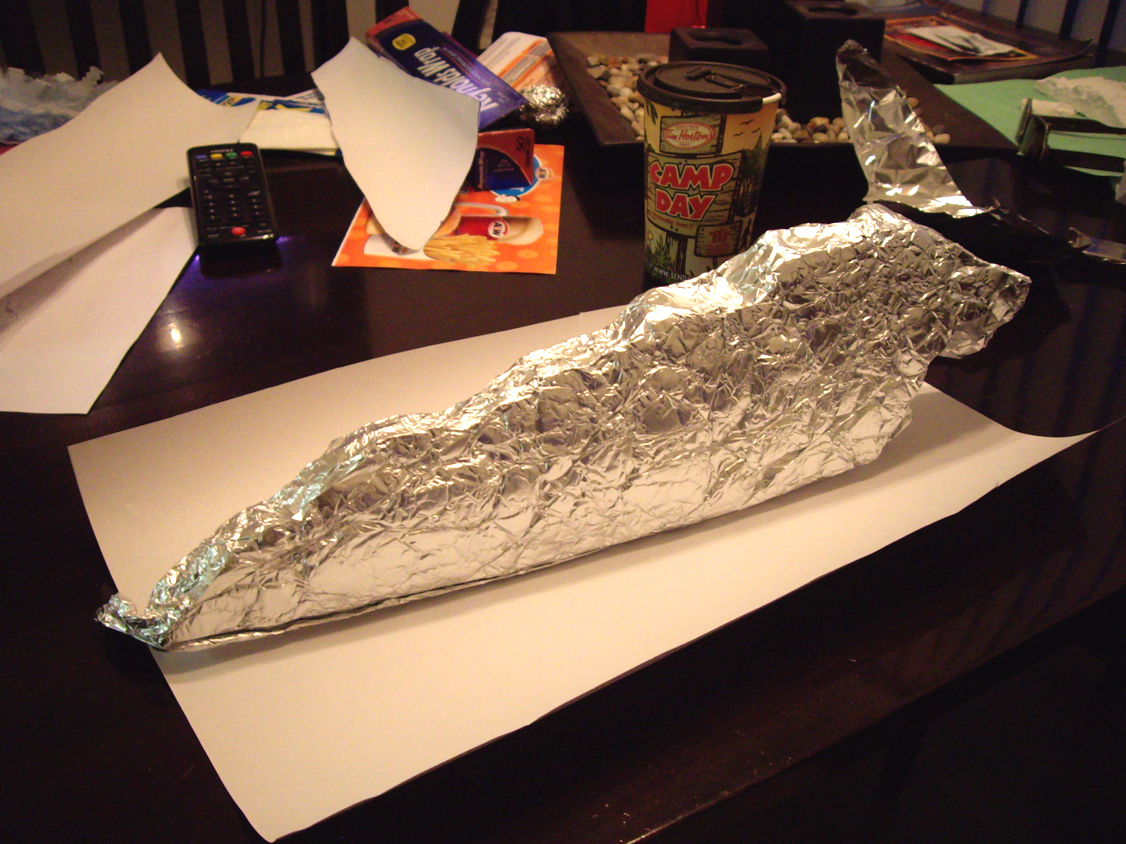
I first traced directly on the backdrop the basic outline that I wanted each of these bluffs to be. I then traced paper templates, and used these templates to start building my molds. I used aluminum foil to create the molds to the desired shape and depth.


I gently crinkled the foil and manipulated it with my fingers, ensuring that the grooves didn�t undercut into the plaster once I poured it. Before pouring the plaster, I coated the foil mold with 70% isopropyl alcohol to help the plaster settle. As soon as the plaster set, I removed the plaster castings. This had to be done very carefully, and as you can see, the castings broke as they were quite thin. Not a issue however as they could be glued back together.

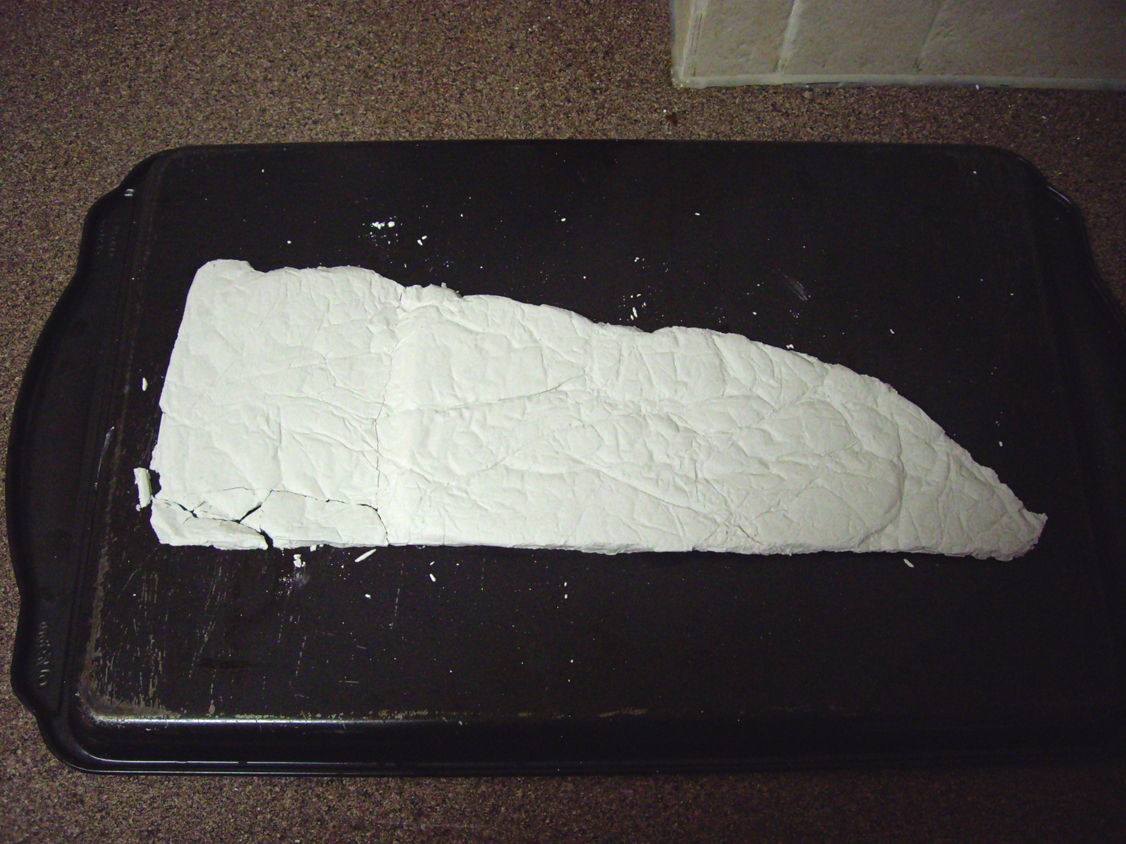
As you can see above, I traced the template directly onto the foil whit a blue sharpie for my first mold, which then ran into the plaster, so I didn�t use this method going forward. Once these were completely dry, I glued the cracked sections together and verified how they fit on my layout.


For the backdrop, I used large sheets of foam board, which had white cardstock glued to each side. This provided a sturdy and workable surface. I made a large template out of scrap newsprint to get the shape I needed my backdrop to be, then traced it onto the foam board and cut it to shape.
I made a small sketch on paper of how I wanted the backdrop to look to make sure I had the correct look and feel (see Design & Planning page). I then drew the basic locations of the mountains, tree lines, rock bluffs, etc. and got right to work painting. I used acrylic paints from the dollar store, which worked great for this application.


I started with the sky colour, then the mountains, and last was the trees. I kept things as simple as possible for 2 reasons. First, I am not professional when it comes to painting, and second, I did a lot of research on backdrops online, and found the more simple backdrops were most effective, as they did not distract from the detailed layout scenery.
Once the backdrop was dry, I fastened it to the original backdrop with double-sided tape. I then glued the previously casted rock bluffs directly to the backdrop, and used Poly-Filler to blend them into the rest of the layout.
Abonneren op:
Posts (Atom)
