zondag 3 april 2011
One Year Mark
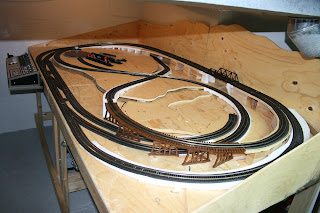
Just over a year later, my benchwork, track, electronics, and control system are finally complete! This weekend I made the last adjustments to my track-work, soldering a few more connections and leveling out a few last problem areas on the track. Both my Backmann EMD GP30 and my Kato SD-40 engines run perfectly on the layout and all aspects of the control panel and electronics, including the dual-cab wiring, work perfectly.
I also added a handle to the winch that raises and lowers the control panel, so I no longer have to use a screwdriver as a lever. I also came up with a latching system that will lock the control panel into place when it is in its raised position. This prevents all of the weight being on the winch cable, and also makes the control panel more rigid when in use.
To do this, I used two double ended bolts that I attached to the underside of my benchwork. I then drilled two holes through the control panel base so the protruding bolt end could pass through the control panel base when it was raised up against the benchwork. I then used butterfly bolts to support the control panel on these bolts. To make locking as easy as possible, I cut slots in the holes that I drilled, allowing the butterfly bolts to pass through the control panel base. This prevents the butterfly nuts from having to be completely undone. Once the butterfly bolt passes through the control panel base, it is turned 90 degrees, allowing the entire control panel to rest on the bolts (as seen above). Metal braces were added to prevent the bolts from damaging the hardboard.
I have now stated to plan the landscaping for me layout, which will be my project for the next couple months at least.
Abonneren op:
Reacties posten (Atom)


Geen opmerkingen:
Een reactie posten